Beginner's Guide to Choosing Your First Scale Model Kit

This guide covers everything needed to choose, buy, and start building a first scale model kit. You'll learn which kit types work best for beginners, what tools actually matter, where to spend money (and where to save it), and how to avoid common first-build mistakes. Whether the interest lies in aircraft, armor, cars, or sci-fi subjects, the right starting point makes the difference between a frustrating experience and a satisfying new hobby.
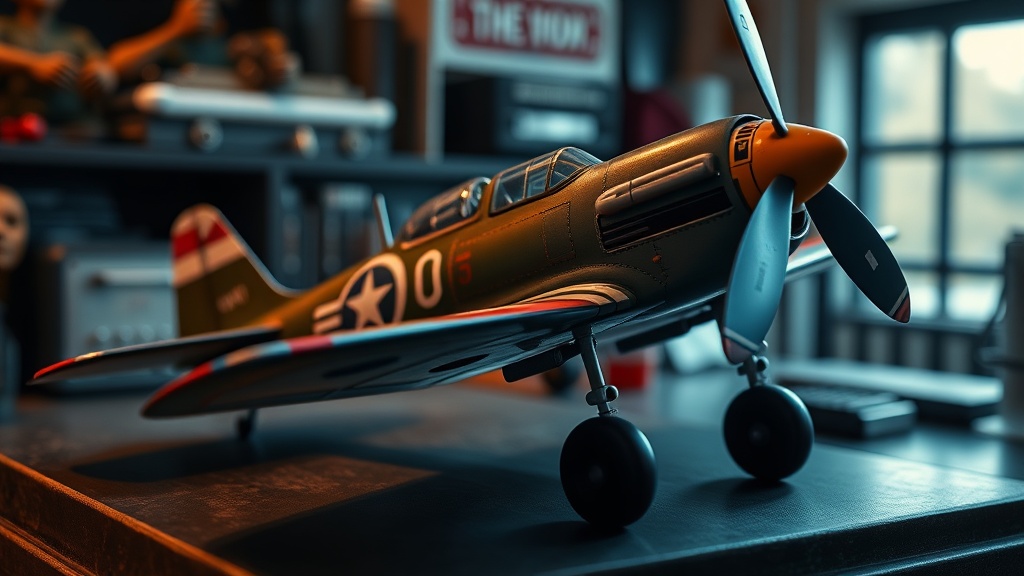
What's the Best Scale for Beginners?
1/72 scale for aircraft and 1/35 scale for armor offer the sweet spot of detail, affordability, and manageable size for first-time builders. These scales dominate the hobby—meaning kit selection is massive, replacement parts are easier to find, and online build resources abound.
Scale represents the ratio of model size to the real thing. A 1/48 scale P-51 Mustang is roughly 8 inches long—big enough to show detail, small enough to display on a bookshelf. Larger scales like 1/24 or 1/32 show more surface texture (panel lines, rivets) but demand more painting skill and shelf space. Smaller scales like 1/144 work for dioramas or limited space, though tiny parts frustrate inexperienced hands.
Here's the thing: aircraft modelers often prefer 1/48 for the balance of detail and build speed. Armor builders lean toward 1/35—it's the historical standard set by Tamiya decades ago, and nearly every tank, truck, and AFV gets released in this scale. Automotive kits shine at 1/24 or 1/25, matching the long tradition of American car models. Sci-fi subjects—Gundam, Star Wars, Star Trek—typically come in 1/144 (High Grade) or 1/100 (Master Grade) for Bandai's snap-fit lines.
Worth noting: starter sets from Revell and Airfix often include paint, glue, and brushes. These work for absolute beginners testing interest, though the included supplies are basic. Dedicated tools upgrade the experience significantly once commitment sets in.
Which Model Kit Brands Should Beginners Consider?
Tamiya, Revell, Bandai, and Hasegawa produce beginner-friendly kits with crisp molding, logical part breakdown, and clear instructions. These manufacturers have refined their entry-level offerings over decades—Tamiya's 1/35 military line practically defined the modern kit standard.
Tamiya remains the gold standard for military vehicle beginners. Their 1/35 M4 Sherman, Panzer IV, and Jeep kits—originally tooled in the 1970s and periodically updated—build almost intuitively. Fit is forgiving. Instructions are visual and precise. Parts counts stay manageable (under 150 pieces for most). That said, newer-tool kits from Tiger Model or Meng offer superior detail but add complexity beginners don't need yet.
Revell (now part of the German Möbius/Round2 group) dominates the American market with accessible price points. Their 1/48 aircraft—P-51D, Spitfire Mk.II, B-25 Mitchell—start around $15-20. The plastic is softer, easier to sand and adjust. The catch? Some Revell kits trace back to molds from the 1960s. Check reviews on Scalemates before buying older boxings.
Bandai revolutionized sci-fi modeling with snap-fit (press-fit) technology. No glue required. High Grade (HG) Gundam kits—like the RX-78-2 or Barbatos—run $12-20, include color-separated parts minimizing paint needs, and pose impressively right out of the box. Perfect gateway kits for younger builders or those intimidated by traditional modeling.
For automotive starters, Hasegawa and Tamiya offer 1/24 sports cars with engineered-fit parts and excellent decal sheets. The Hasegawa 1/24 Lamborghini Countach or Tamiya 1/24 Porsche 911 kits build cleanly and look stunning with basic painting.
| Kit Type | Recommended Starter Kit | Scale | Approx. Price | Difficulty |
|---|---|---|---|---|
| Aircraft | Revell 1/48 P-51D Mustang | 1/48 | $16-20 | Beginner |
| Armor | Tamiya 1/35 M4 Sherman | 1/35 | $20-25 | Beginner |
| Automotive | Tamiya 1/24 Volkswagen Beetle | 1/24 | $22-28 | Beginner |
| Sci-Fi | Bandai HG RX-78-2 Gundam | 1/144 | $13-16 | Novice |
What Tools Do You Actually Need to Start?
Four tools handle 90% of beginner building: side cutters (sprue cutters), a hobby knife, tweezers, and plastic cement. Total investment: $30-40. Everything else—specialty sanding sticks, airbrushes, photo-etch tools—comes later if the hobby sticks.
Side cutters remove parts from the plastic sprue frames. Don't use hardware store wire cutters—they crush plastic and leave ugly stubs. The Xuron 2175ET Professional Sprue Cutter ($15) offers clean cuts without marring parts. Cheaper alternatives like the Army Painter Plastic Cutter ($8) work fine for first builds.
A sharp hobby knife handles cleanup—trimming mold lines, separating delicate parts, trimming decals. The #11 blade is standard. Handles with textured grips (X-Acto #1, Fiskars Softgrip) reduce hand fatigue. Blades dull faster than expected; buy a 100-pack of replacements.
Tweezers place tiny parts and position decals. Fine-point versions (Tamiya Decal Tweezers, $8) offer precision. Curved tips help with awkward angles. Worth noting: static electricity makes small parts jump—breathing on the part or touching it with a damp finger solves this.
Adhesive choices matter. Plastic cement (Tamiya Extra Thin, $6) melts plastic slightly, welding parts together permanently. It dries fast—10-15 seconds—so alignment must be quick and confident. Tube glue (Testors, Revell Contacta) offers longer working time but stringy application. For Bandai snap-fit kits, glue isn't needed at all.
How Much Should You Spend on Your First Kit?
Budget $30-50 total: $15-25 for the kit, $15-25 for basic tools. Avoid expensive "starter sets" with bundled airbrushes or full paint ranges. Invest more after completing two or three builds and confirming genuine interest.
Kits under $10 exist—old-tool Airfix, some Revell reboxes—but often fight back. Poor fit, thick sprue attachments, vague instructions. Frustration kills hobby interest faster than anything. Spend the extra $8 for a Tamiya or recent-tool kit. The building experience transforms from struggle to satisfaction.
Paint adds cost. Spray cans (Testors, Tamiya TS series, $6-8 each) cover large areas fast with smooth finish. Brush painting demands acrylics—Vallejo Model Color, Citadel, or Tamiya jar acrylics ($3-4 per pot). For a first aircraft or armor build: one can of primer, one camouflage color, one detail color. That's $20 in paint maximum.
Building Your First Model: Step-by-Step Basics
Preparation beats speed. Lay out all sprues and check them against the parts map in the instructions. Missing pieces happen—contact the manufacturer's customer service (Tamiya America, Revell Germany) for replacements. Most ship free within a week.
Remove parts by cutting the sprue a few millimeters away from the part, then trimming the remaining nub with the knife. Never twist parts off the sprue—stress marks appear, weakening the plastic.
Dry-fit before gluing. Test how parts align. The catch? Some kits intentionally design loose fits for easier assembly. Others demand precise alignment. Tamiya's engineering usually clicks into place. Older kits may need tape or rubber bands to hold alignment while glue sets.
Seam lines (where mold halves meet) appear on round parts—fuselages, turrets, fuel tanks. Ignore them on build one. On build two or three, sand them with 400-grit paper, then 600-grit, then prime and repaint. Squadron Green Putty or Tamiya Basic Putty fills gaps.
Decals (the stickers with ink printed on them) apply with water and patience. Cut from the sheet, soak in warm water 10-20 seconds, slide onto the model, position with a cotton swab or brush, then blot excess water. Decal setting solution (Micro Set, Micro Sol) helps them snuggle into panel lines.
Where Should You Buy Model Kits?
Local hobby shops offer immediate gratification, knowledgeable staff, and community—though prices run 20-30% above online retailers. Online specialists like ScaleHobbyist (US) and HLJ.com (Japan, global shipping) stock vast selections with competitive pricing. Amazon works for common kits but check seller ratings—counterfeit or damaged stock occasionally surfaces.
Chains like Michaels and Hobby Lobby carry limited Revell and Testors ranges. Use their 40% coupons for significant savings. Independent shops (check the IPMS/USA directory) often host build nights and clinics—priceless for learning techniques firsthand.
The secondhand market (eBay, Facebook groups, estate sales) offers deals on out-of-production kits. Verify completeness—unstarted kits with sealed bags are safest. Built or partially built kits present restoration challenges beginners should avoid.
Common Beginner Mistakes (And How to Avoid Them)
Using too much glue creates melted, shiny scars around joints. Apply cement sparingly with the brush cap or a toothpick. Less is more—capillary action draws thin cement into seams.
Skipping primer shows every fingerprint, sanding mark, and plastic molding texture. Gray or white primer (Tamiya Fine Surface Primer, Rustoleum 2X sandable) provides a uniform base. Colored plastic—especially dark red or blue—bleeds through light paint without primer.
Rushing the build produces obvious misalignments, glue fingerprints, and torn decals. Scale modeling rewards patience. A "quick" weekend build often stretches to two weekends. That's normal. The result—something built by hand—outlasts any purchased collectible.
That said, perfection isn't the goal on kit one. Visible seams, slightly crooked decals, thick paint—these mark the beginning of a path. Every expert builder started with wobbly first attempts. The difference between someone who sticks with the hobby and someone who quits isn't talent. It's finishing that first kit, flaws and all, and starting the second.